Understanding the NotebookLM Project Board layout
This is the third part of the series on using NotebookLM for Project Management. while so far we have focused on conceptually understanding NotebookLM in the world of Gen AI tool, we now dive into the details.
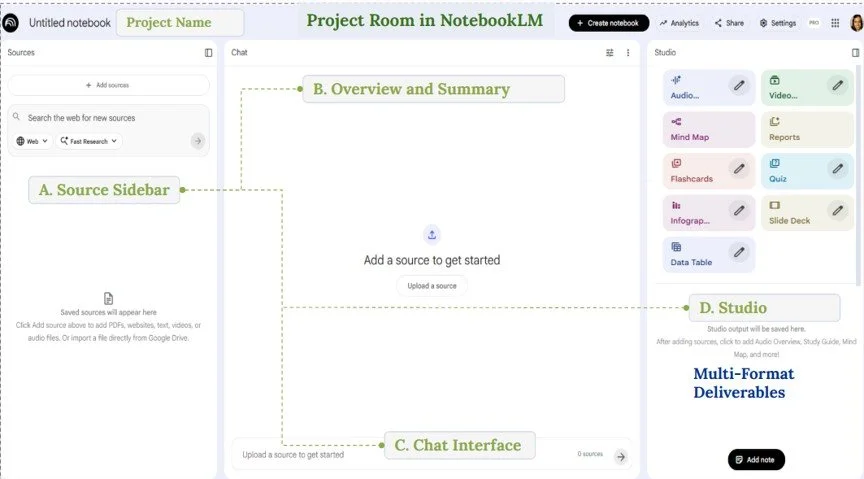
Starting your project in NotebookLM requires you to understand how a Notebook is set up - for me a Notebook serves as a Project Board.
The NotebookLM Screen has the following components:

(A) Sources
(B) Overview and Summary
(C) Chat
(D) Studio
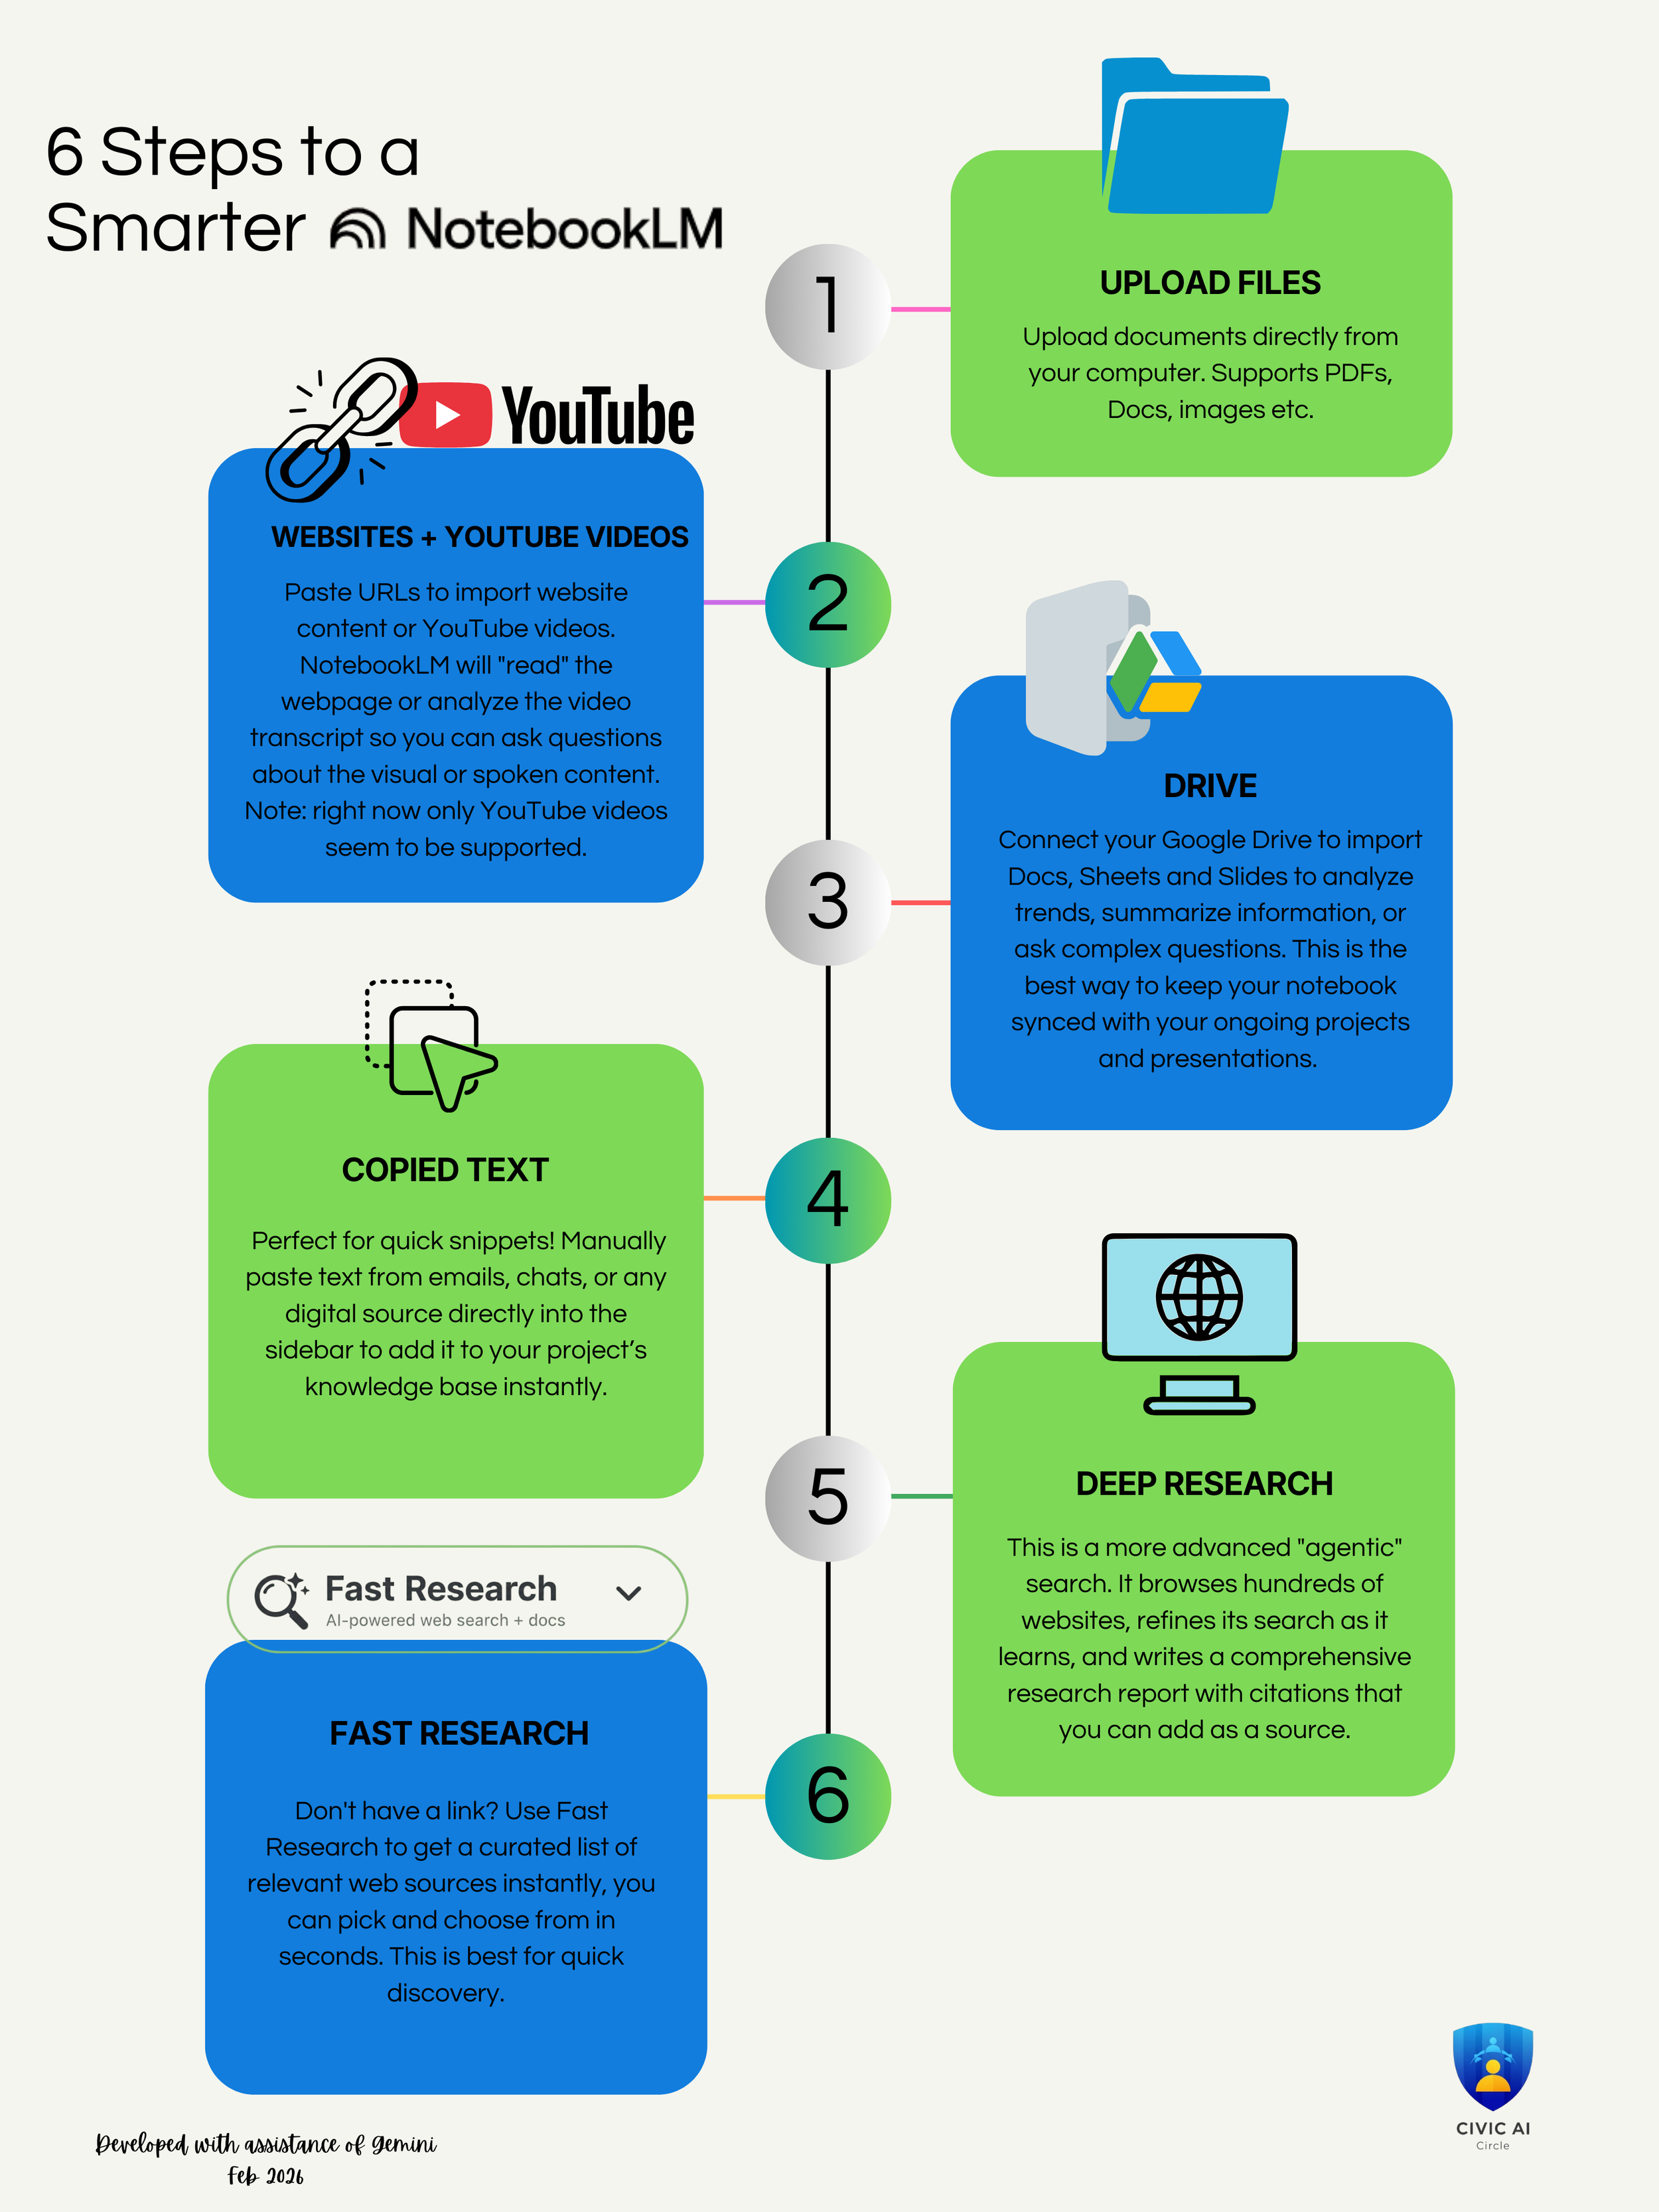
Sources are the information you provided to NotebookLM and its outputs are grounded in these inputs. This is different than a general purpose chatbot, that seeks sources from the web. NotebookLM provides citations from your sources for its responses. Sources are the universe of data and information you want to be considered for your project. What can you upload, and what are some considerations and limitations?